part six
This was my most fun day yet! I took a few days' break from the project and came back to it fresh (which means that yes, the Days in my post titles are not necessarily consecutive). I was starting to feel bogged down in what had to be done, but after setting it aside for a while, I was eager to start working again. Wednesday is volunteer night at Sibley and one of the few times that I can make it to the shop with my job schedule. I brought the bike down in pieces and tried to get it all put together again.
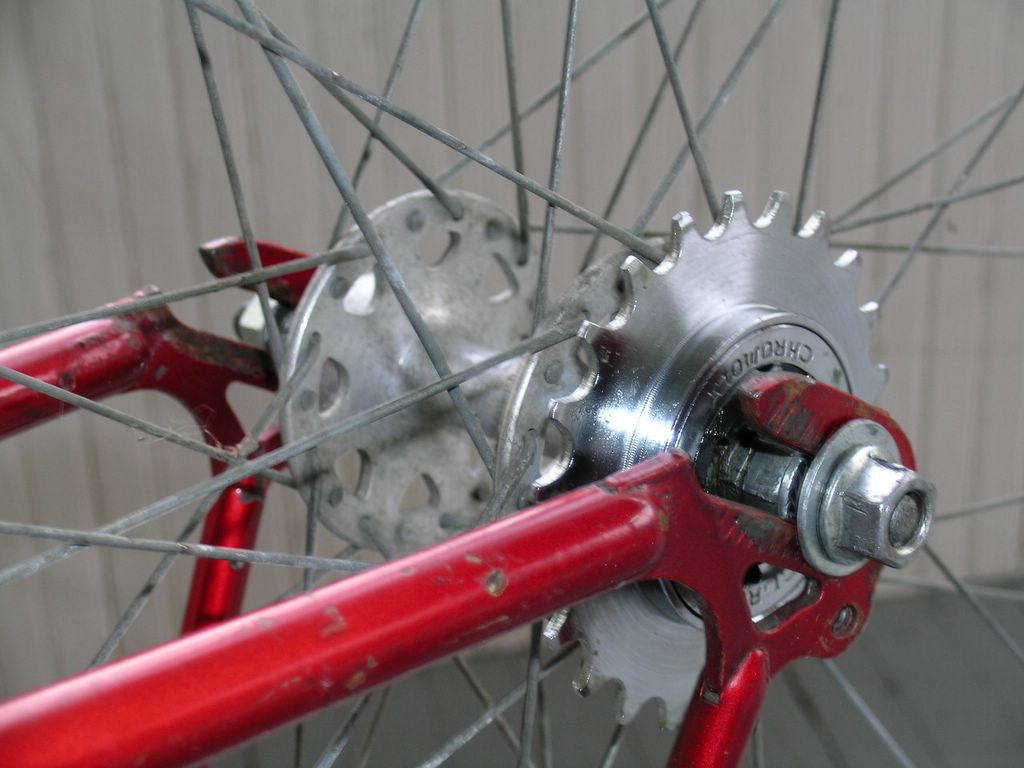
Unicycle lessons were in progress when I arrived, so I claimed an out-of-the-way stand and watched a girl try to ride this funny machine while I worked. The first step was to remove my crankarm to take off the unnecessary 40-tooth cog. It was much easier this time. Now I only have the 52-tooth cog in front and the 20-tooth freewheel in back. Nice & simple.

After getting that spare part out of the way, it was time to reinsert the seatpost. Big dollop of grease in the tube, generous portion slathered on the post, slide it in and clamp it tight.

The next task, a more difficult job, was to finish dishing and truing the wheel and respacing the axle so that the wheel is centered and the freewheel lines up with the cog. In other words, chain line. Dishing on this wheel has been less than ideal due to the age and quality of the wheel and a couple three stripped nipples. To my horror, I discovered that I had also been inadvertantly making the problem worse by using the wrong size spoke wrench--the nipples on the Batavus are slightly smaller than the ones on my Bianchi.
It would probably be best to replace the worthless parts and do a proper job, but I have no skill or knowledge of wheelbuilding and didn't want to undo something that I couldn't fix. I did the best I could with what I had. While I worked at the truing stand, I met a volunteer whose sister rides a Batavus with top tube that looks a little something like this.
The shop was starting to fill up with volunteers working on bikes; one group was assembling an orange Pedicab. The parts came in several large boxes with no instructions or illustrations of the finished product. Now that looked like a big project.
After taking a break to grab some popcorn, I got back to my own bike. Loosening up the stuff on the axle wasn't as difficult as I feared, so I got everything loose and stuck the wheel in the frame to eyeball my new fit. With the help of some new spacers from the parts bin, I centered the wheel and chain line as best I could, and re-tightened the axle parts.
I assumed/hoped that this would not affect the balls inside that make everything work smoothly, but when I got home that night and checked my work, the wheel was spinning roughly. I can hear what sounds like something little clacking around in there when it spins (I also forgot, again, to put the spoke guard back on!). I'll probably need to take it all apart again later, but I was unaware of this problem at the shop and moved on to my next job--cooking weiners!
While I supervised the grill on the outside deck, I talked with Tom, who I have now seen around the Depot on several occasions. He's in the market for a new bike but meanwhile was replacing some cables on his ride. I showed him my project and someone else took over on weiner duty. Then I started the real fun of the night, which was trimming and routing my own brake cables.
It should have been a relatively simple task, but I took a long time doing it. The housing and cable for my front brake were completely disconnected when I purchased the bike, and also extremely long, so I had lots of options. Plus, of course, I wanted to make sure I did it right. I looked at some other bikes in the shop to get ideas for where the front cable should go and how short to trim it. Finally I snipped the housing to the length I wanted, which crimped the end shut, which I had to trim and file and pry back open. I reinserted the cable and trimmed it, but the end was badly frayed and I couldn't get it through the brake's little cable-grabber thingie (highly technical term).
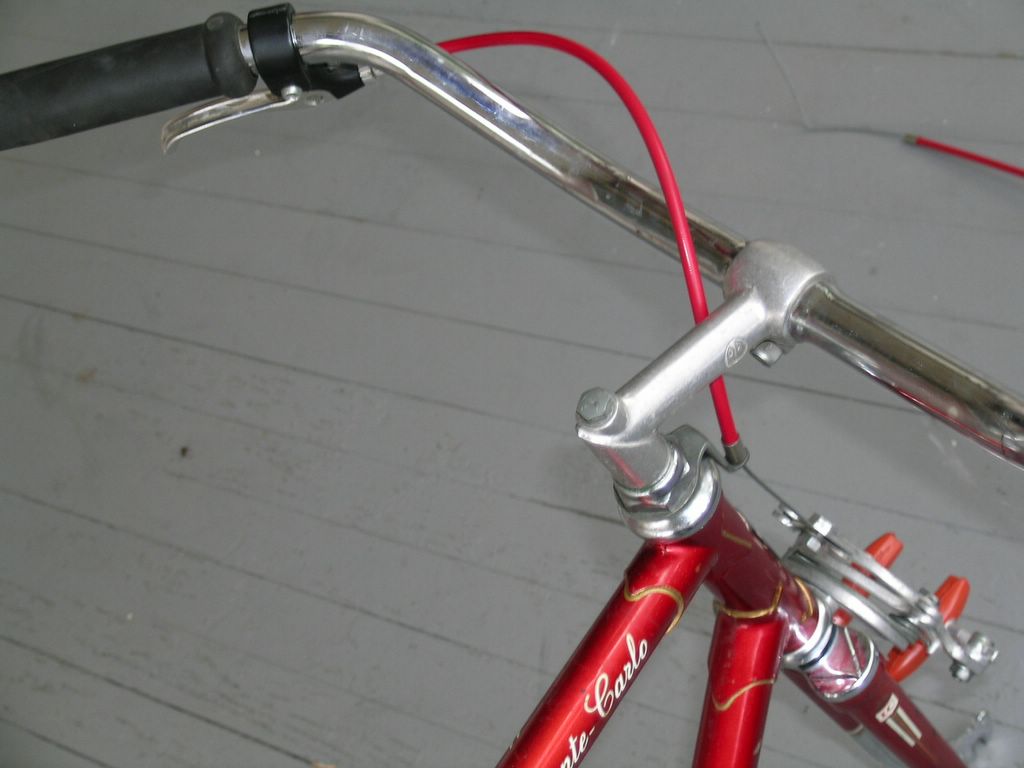
At last I found a good sharp wirecutter and made a clean cut, threaded everything where it should go, and tightened it all up. Looks pretty decent, if I say so myself. I didn't have time to reinstall the rear cable, but I put both the tires on and got the brakes in basically the correct places. I left the shop with a big sense of accomplishment. I tried to attach the chain at home that night but--once again!--I didn't have the chain tool that I needed to take out all the extra links and get it down to a trim one-speed size.
Reckon as I've got a few days of work left, but I'm a lot closer to having a rideable bike than I was the day before. The end is in sight!

1 Comments:
If you desire to get a great deal from this article then you have to apply such techniques to
your won webpage.
Here is my site; black computer desk for small spaces
Post a Comment
<< Home